My review of the Google OnHub router, and some tips on setting up advanced options like port forwarding.
While in the US for a trip in October, I decided to pick up a Google OnHub router, which is only available in America, and has since been superseded by Google WiFi, also only available in America. There are two different routers available with this brand name – one made by ASUS, the other by TP-Link. I have the TP-Link model.
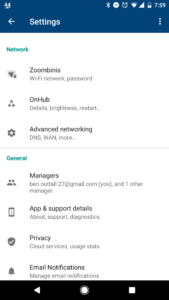
The OnHub is the best router I’ve ever owned. It’s channel-hopping and will seamlessly switch you between 2.4GHz and 5GHz with a single SSID. My desktop is two floors up from the router and its WiFi connection is solid (just as good as wired), which is really handy. The OnHub’s a little unique, in that there’s no web interface to its configuration – it’s all done within an app. This has its positives and negatives, and had made a lot of nerdy friends of mine shriek at the idea, but it certainly does make things easy. You can add other users to be a “manager” of the hub, which allows them to control it from the app too.

It’s important to note that the OnHub is only a router, not a modem. It only has an Ethernet port for connection in – no DSL/ADSL/VDSL, so you have to use a modem, or another router, plugged into the wall, then connect to that with an Ethernet cable. You can use it to connect directly to your ISP (still via the modem), but that doesn’t seem to be possible at the point of setup. It assumes you have already connected it to the internet at this point – it expects a working internet connection provided by your modem. But if you want to reconfigure it later, you can (that was an important step for me – port forwarding wasn’t possible until I reconfigured).
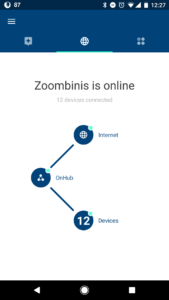
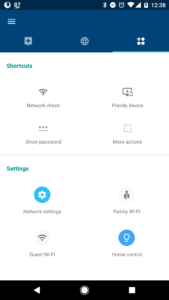
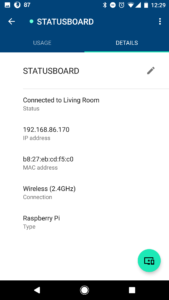
You start by installing the app, available for Android and iOS (the app is now Google WiFi), and you tell it you want to set up a new WiFi point. The whole setup is done from the app: you connect wirelessly to the hub, choose your SSID name and password and that’s about it. You then manage the hub from the app – via the internet, not via the LAN. So you can manage it remotely using your phone, but you cannot plug an Ethernet cable in and configure it in a browser. It’s a shame configuration is limited to the app – a browser-based version would be really useful – over the internet and locally. The app can tell you the status of your network while you’re away from home too:
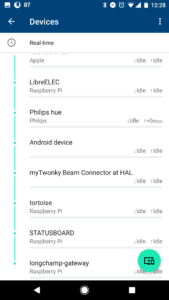
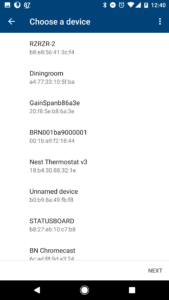
I’ve always preferred a wired connection to wireless, as it tends to be faster, and way more reliable. But with the OnHub I’m more than happy not to have had to run Ethernet cables all over my house, because the speed and reliability are spot on – it wouldn’t be worth cabling. It’s also handy as I use a lot of Raspberry Pis day-to-day, and the Pi 3 and the new Pi Zero W both have decent 2.4GHz WiFi so I can easily connect to them without worrying about wiring them all up. This is also the perfect time to mention that the app shows you all the devices on your network, and their IP address (all in the 192.168.86.x range), which makes it easy to connect to a headless Pi I just plugged in:
It’s really easy to reserve IPs for your devices:
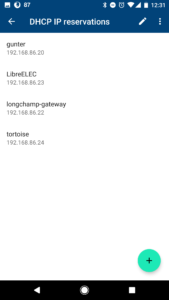
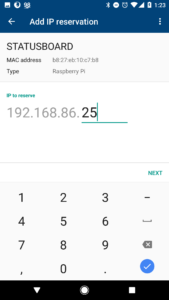
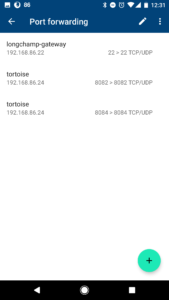
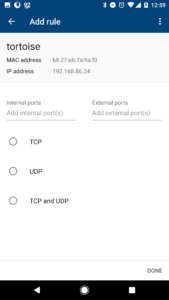
The one difficulty I had was with port forwarding. Now, in theory, this is dead simple. The app has a “port forwarding” option in the menu, and it’s completely intuitive. You have to reserve an IP for your device in order to set up port forwarding, but that’s no problem. Any rules I set up just didn’t seem to work, and I didn’t understand why.
Of course, searching online for help only gave me simple instructions using the app – exactly what I’d done. But I figured something was missing. Originally, I’d been using the Plusnet router from my ISP as the modem, and just connecting the OnHub to it directly, but of course this meant that the PlusNet router was handling port forwarding requests. I reconfigured this router into its “modem” mode – but still no luck. I replaced it with a simpler modem, the Netgear DM200. Annoyingly the DM200 had both modem-only and router+modem modes too, so I switched to modem mode and simply couldn’t get it to work.
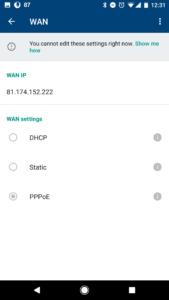
It was suggested to me (thanks Dave) to see if the OnHub had a PPPoE mode, as that would allow me to configure it with my ISP’s login credentials. Setting up PPPoE mode wasn’t easy, as you have to take the OnHub offline to do it. But the key was that previously, the hub’s own WAN IP was a local IP, given by the Netgear modem, but that in order to deal with outside requests, needed to be an external IP. I needed to give it my ISP’s info.
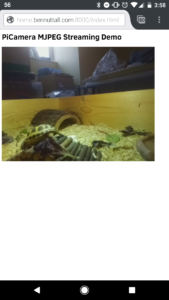
I tried this, and ended up having to restart the setup procedure on both devices multiple times, but eventually, managed to get it sorted – and port forwarding worked at last! I then had a working SSH gateway, and online tortoise cam:

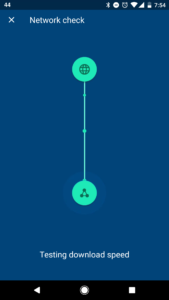
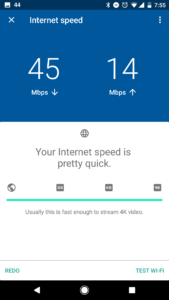
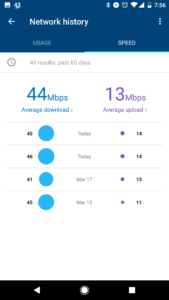
The app also lets you perform a speed test, both on your internet connection and WiFi speed, and you can see historical data on your average speed each day:
The OnHub only has a single Ethernet port for connecting another device, so if you need to connect more than one wired device, you’ll need a hub.
The OnHub is quite pricey, but you get one hell of a router. I paid about $125 for it. You can’t really buy them any more, but Google WiFi costs about the same. It’s not clear to me what the differences are. People say the WiFi is superior, but they seem to recommend you get 3 of them and mesh them – so 3x the price of the OnHub… but perhaps this isn’t absolutely necessary. If it’s anything like the OnHub then one will reach all corners of a regular sized house just fine.