The recent announcement of the latest release of the Raspberry Pi Desktop x86 image alongside Raspbian Stretch for Raspberry Pi included mention of a GPIO expander tool, which was followed up by another blog post explaining how it works and how to use it. Since it uses pigpio to control the GPIO pins, that means you can use my GPIO Zero Python library to use it. And as of yesterday, you can easily set this up on an Ubuntu PC, not just Raspberry Pi Desktop.
What is it?
The GPIO expander tool means you can connect a Pi Zero or Pi Zero W to a regular PC with just a USB micro cable, no SD card required, and control the GPIO pins. It currently works on Linux only, but support for Windows and Mac should be expected … at some point.
For now, if you don’t use Linux, you can live boot the Raspberry Pi Desktop x86 OS from a DVD or USB stick, and do it from a Windows PC or a Mac, but eventually it should be possible to do natively from those operating systems.
How does it work?
The Pi Zero features a USB OTG port, allowing you to boot over USB from a PC. Your PC sends the required boot firmware to the Pi over the USB cable, launching a mini version of Raspbian and booting it in RAM. The OS then starts the pigpio daemon, allowing “remote” access over the USB cable.
How to use on Raspberry Pi Desktop x86
You can download an ISO of the Raspberry Pi Desktop OS from raspberrypi.org which you can write to a USB stick or burn to a DVD. This must be the Stretch release, not the older Jessie image.
You can use these to live boot your PC or Mac into the OS (select “Run with persistence” and your computer will be back to normal afterwards). The OS comes with everything you need, ready to go.
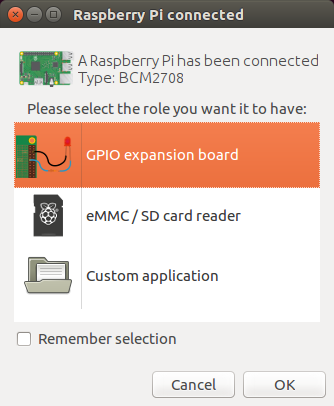
Plug in your Pi Zero, and you’ll be prompted to select a role for the device. Select GPIO expansion board and continue. It will take 30 seconds or so to flash it, then the dialogue will disappear.
How to use on a Raspberry Pi
Using on Raspbian on a Pi is almost as easy as the x86 image, except that the usbbootgui tool is not pre-installed. You can install it on Raspbian Stretch:
$ sudo apt update
$ sudo apt install usbbootgui
Now when you plug in your Pi Zero, you get the dialogue as above.
How to use on Ubuntu
We have created a PPA of the packages you need to make this work. Start by adding the PPA:
$ sudo add-apt-repository ppa:rpi-distro/ppa
$ sudo apt update
If you have previously installed gpiozero or pigpio with pip, uninstall these first:
$ sudo pip3 uninstall gpiozero pigpio
Then install the required packages from the PPA:
$ sudo apt install usbbootgui python3-gpiozero python3-pigpio
Now when you plug in your Pi Zero, you get the dialogue as above.
Access the GPIOs
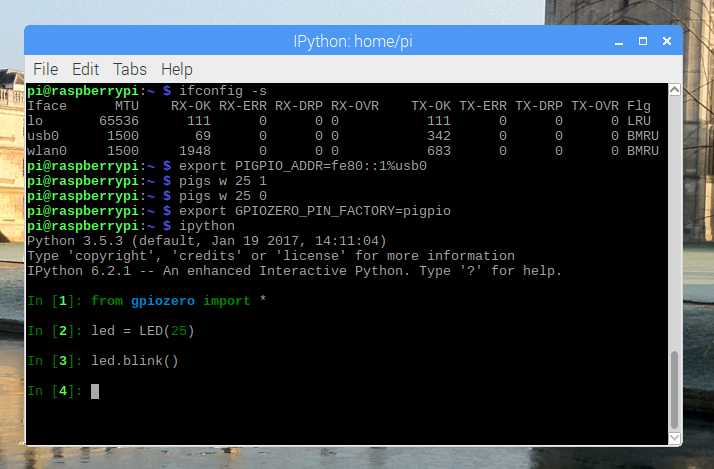
Looking at the output of ifconfig, and you’ll see a new ethernet connection with an IPv6 address. On Raspbian and Raspberry Pi Desktop, this will be usb0. On Ubuntu it’s some silly string (mine is enp0s29u1u7i2).
You can ping it (be sure to use ping6 as it’s IPv6 only) using the address fe80::1% followed by the connection string, e.g:
$ ping6 fe80::1%usb0
If you set the PIGPIO_ADDR environment variable, all calls to pigpio therafter will use that as the address to connect to:
$ export PIGPIO_ADDR=fe80::1%usb0
For a simple test, you can use the command line interface provided by pigpio, named pigs:
$ pigs w 25 1 # turn pin 25 on
$ pigs w 25 0 # turn pin 25 off
Enter GPIO Zero
For a while now, GPIO Zero has supported using pigpio as the back-end. This meant you could connect to a Pi on the network from a PC or another Pi, and even control multiple Pis from the same script, but that required the remote Pi to have an SD card and Raspbian running, and the pigpio daemon running, and allowing remote connections. Similarly, Pi Zero OTG mode was possible, but that also required an SD card, and lots of configuration.
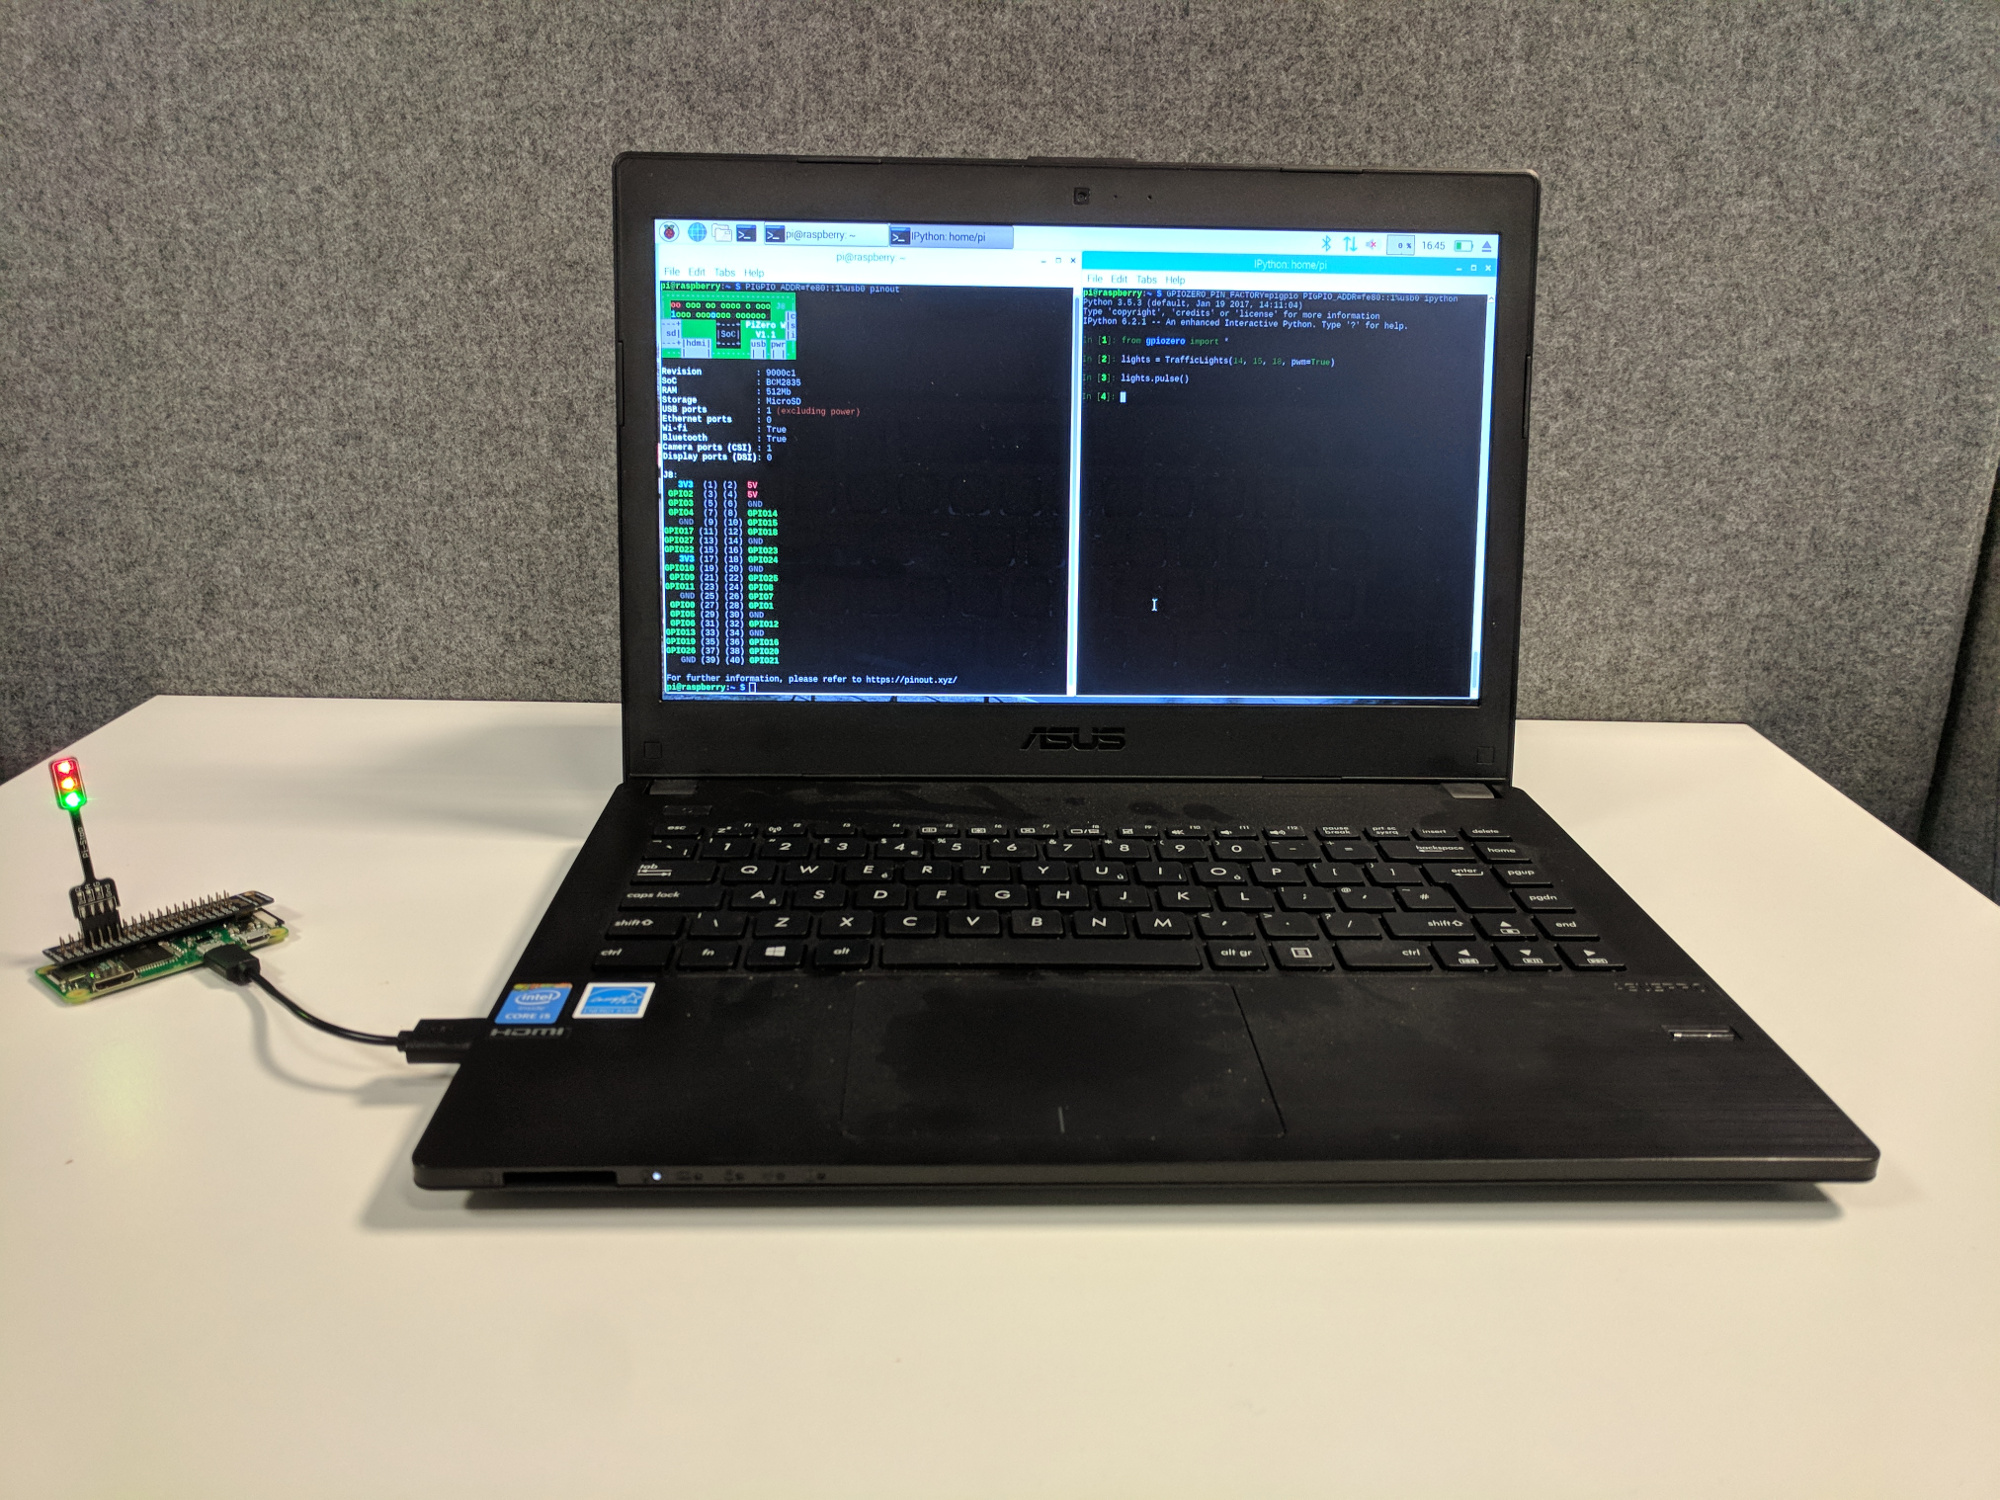
Since the GPIO expander tool does exactly the same thing, naturally GPIO Zero just works out of the box! Like connecting to a remote Pi, you just specify that you’re using pigpio as the pin factory, and specify the address (as done earlier). You can do this with another environment variable:
$ export GPIOZERO_PIN_FACTORY=pigpio
Now when you use GPIO Zero within Python, connections will be to the Pi Zero:
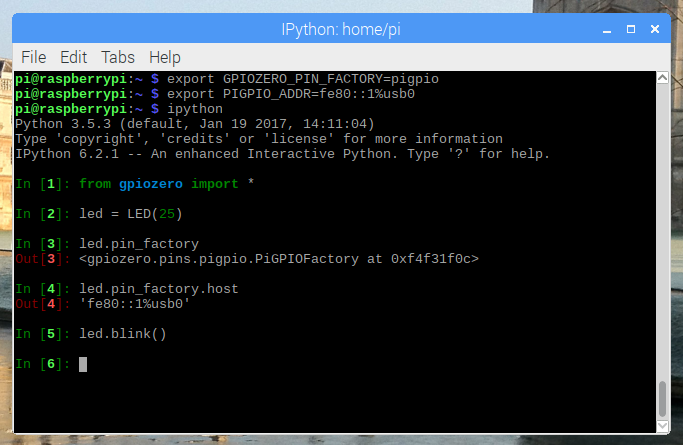
Set your environment variables as above, and use python/python3/ipython at the command line, or an IDE. You probably want to set the environment variables globally – just export them in your .profile file like so:
export GPIOZERO_PIN_FACTORY=pigpio
export PIGPIO_ADDR=fe80::1%usb0
Scratch too
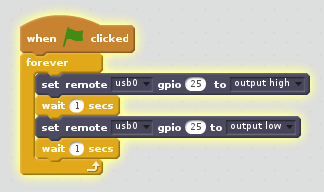
Scratch 2 is now included in Raspbian and Raspberry Pi Desktop x86. This includes a GPIO extension which uses pigpio. The x86 version has been adapted to allow access to Pi Zeros over USB:
Multiple Pi Zeros?
In theory, this should work for multiple Pi Zeros. However, it seems there’s an issue with the USB boot tool, knocking the first one out when you add a second.
On Raspberry Pi Desktop each Pi comes up with an enumerated name (usb0, usb1, etc). On Ubuntu mine were enp0s29u1u7i2 and enp0s29u1u8i2, but they’re easy to look up in ifconfig.
In GPIO Zero, if this worked, you’d be able to create devices on multiple devices using the pin_factory parameter:
from gpiozero import TrafficHat
from gpiozero.pins.pigpio import PiGPIOFactory
from signal import pause

usb0 = PiGPIOFactory('fe80::1%usb0')
usb1 = PiGPIOFactory('fe80::1%usb1')

hat0 = TrafficHat(pin_factory=usb0)
hat1 = TrafficHat(pin_factory=usb1)

hat0.button.when_pressed = hat1.lights.on
hat0.button.when_released = hat1.lights.off
hat1.button.when_pressed = hat0.lights.on
hat1.button.when_released = hat0.lights.off

pause()
(this example makes each Traffic HAT’s button control the lights of the other one)
Scratch 2 contains a dropdown for usb0 to usb3:
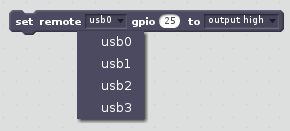
But as I say, it doesn’t work yet.
Limitations
The major limitations are that you cannot flash code to the Pi Zero, and that not all software is supported.
Since the Pi Zero has booted from your PC, as soon as you disconnect it, any running programs will terminate. There’s no way of keeping a battery attached, or anything like that, so you can only prototype your ideas with it, not deploy any finished projects to it without transitioning to the regular SD card setup.
Also, since GPIO access relies on the pigpio library, only software compatible with pigpio will work. Since GPIO Zero features multiple back-ends (you can use a number of different low-level pin libraries to do the GPIO stuff but the API for the code you write remains the same), and supports pigpio, then anything in GPIO Zero will work just fine.
However, things like Pimoroni’s extensive collection of HATs, which are written using libraries which do not support remote GPIO, just direct GPIO/SPI/I2C, will not be compatible. If you have GPIO software which is built on top of RPi.GPIO, wiringpi, spidev and others, you will need to re-implement to use pigpio in order to gain support for the GPIO expander. This includes the Sense HAT.
Also, the Scratch support is currently limited to Scratch 2. While Scratch 2 is a better and more modern interface, some people prefer Scratch 1 as it’s much faster (hugely optimised Smalltalk vs. late Adobe Flash port). In theory, Scratch 1 should be able to access Pi Zeros using this method, as it also uses pigpio for GPIO. However, it seems to be hard-coded to use localhost, and the code doesn’t seem accessible. Perhaps this will be addressed in a future release.
Workshops
This is a real game changer for Raspberry Jams, Code Clubs, CoderDojos and use in schools. You can live boot the Raspberry Pi Desktop OS from a USB stick, use Linux PCs or even install Raspberry Pi Desktop on old computers. Then you have really simple access to physical computing without full Raspberry Pi setups, and no SD cards to configure.